Journal

Knitting With Bouclé
Bouclé yarns are making a bit of a comeback, but what can you knit with them? I get asked this question regularly. There's not a lot of patterns out there (yet!) and it isn't a yarn most knitters are familiar with. So, I thought now would be a great time to write a blog post to give you all some simple tips on what patterns to look for when using bouclé.
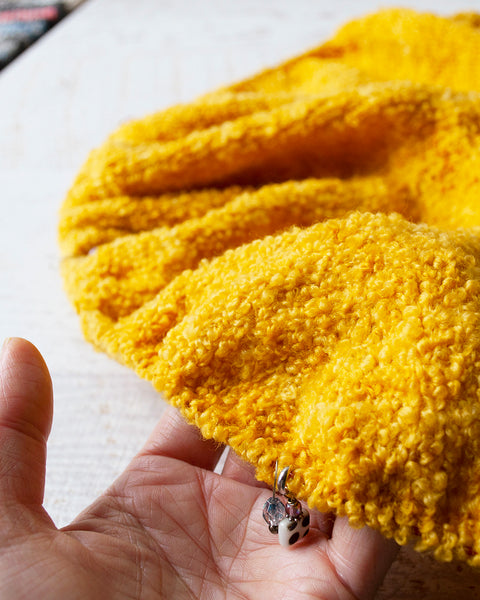
Firstly, bouclé yarn is highly textured. The yarn itself features lots of tiny loops that knit up into a fabric that looks a little like terry toweling. Because of this, you don't want to choose patterns that feature fancy stitches, cables or lace - these details will be hidden under all those loops. The best patterns for bouclé feature simple stockinette or garter stitch with, or without, a rib.
Colourwork, on the other hand, looks great. Stripes, slipped stitches, stranded colourwork, even brioche looks great knit in bouclé yarn. I'm planning to cast on a Soldotna Crop by Caitlin Hunter with our bouclé yarn Curly. I can't wait to see how it turns out!
Basically, the simpler the stitch the better when choosing patterns for bouclé yarn. The most important thing to look for is a pattern that features simple stockinette or garter stitch with or without colourwork.
Here's a few pattern ideas:

Superlative Sweater by Samantha Guerin

Ship Shape by Heidi Kirrmaier
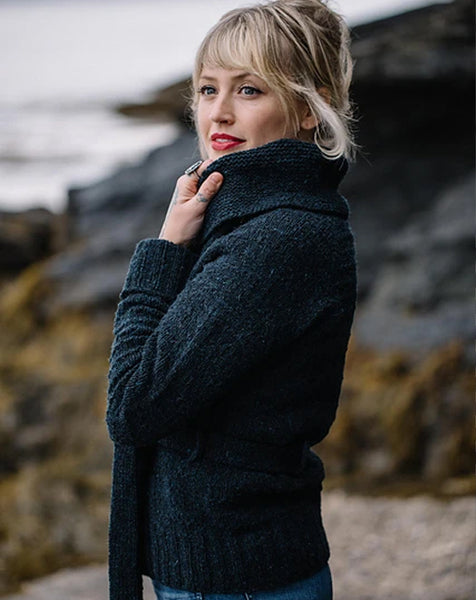
Ginny by Andrea Mowrey
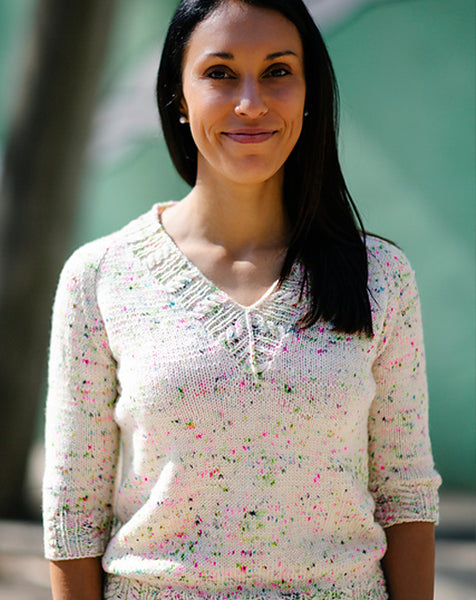
Arco Iris by Joji Locatelli
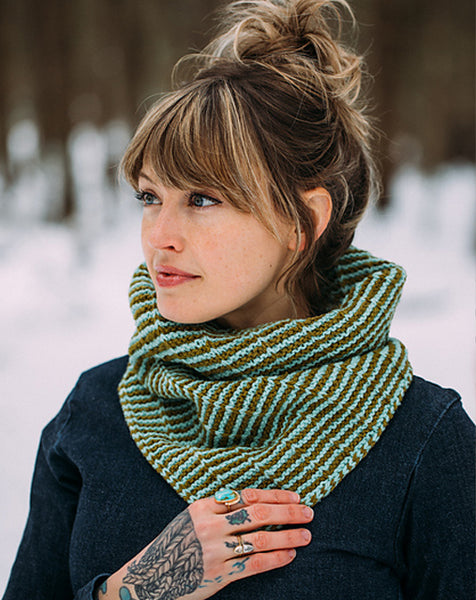
DRK Everyday Cowl by Andrea Mowrey

Field Day Cardigan by Hailey Smedley

Balloon Cardigan by PetiteKnit (this is the pattern I knit, pictured in the beginning of the article)
Hope this helps!

Let's Talk About Knots!
Knot! The word, when it comes to knitting, is akin to a swear word. Some people don't mind coming across a knot or two in their yarn, while others classify it as a disaster. It's a bit of a touchy subject, but I thought it was an important issue to address. So here we go.
Knots are unavoidable
Yarn is essentially a piece of string that, during the milling process, sometimes breaks. The mill isn't going to throw away good yarn because of a single breakage. So, what they do is tie the yarn together with a knot and the process carries on. Now, unless a yarn company or dyer inspects every millimetre of each skein looking for knots (and let's face it, who has time for that!) nobody is going to know a knot is there until someone discovers it while knitting. It is a pain, especially when you're mid row, BUT HERE'S THE GOOD PART: knots can be fixed!
How to deal with knots in your yarn
Firstly, check that it's actually a knot. Sometimes yarn gets a little tangled and may look like a knot, but if you can't see the join just give the two ends a little pull and hopefully the yarn will untangle. If you've discovered a real knot at the beginning of your row, then it's really easy. All you need to do here is cut the knot out and re-join the yarn as you would if you were joining a new ball. However, if you discover a knot mid row, this is what you need to do:
- Spit-Splice: This technique only works with animal fibres that have not been superwash treated. Essentially what you are doing is felting the two ends of the yarn together to form an even join. Here's a very helpful video on how to Spit-Splice.
- Magic Knot: It truly is a magical knot that won't come undone! Check out this video which demonstrates how to tie a magic knot.
- Russian Join: This is a bit more fiddly but the results are a seamless join. See this video to find out how to do a Russian join.
- Just knit it!: Some people just knit the knot into their project. There are a few reasons I wouldn't advise this method. Firstly, you can't be sure that the knot will stay secure. It's likely that your knot will unravel, leading to holes that are WAY worse than knots! Also, knots usually work their way to the front of the project, so they become visible. Take the time to deal with the knot using one of the above methods; you'll be thankful you did.
But shouldn't skeins with knots be discounted?
I was reading a forum post on Ravelry a little while ago in the Yarn & Fibre group about knots in yarns. Quite a few people mentioned that dyers and yarn companies should reduce the price of skeins with knots. While reading this I was thinking of how many hours it would take us here at Skein to inspect every skein of yarn for knots. Honestly, it would take days. Add this time to the total cost of manufacturing and you would end up with very expensive yarn! So should skeins with knots be discounted? No, we believe that one to three knots in a skein is acceptable. In reality knots, as mentioned above, can be very easily and quickly fixed, whereas checking individual skeins for knots would add to the cost of the yarn not detract from it.
When knots become unacceptable
I've read that it's an industry standard to consider three knots in a 50g skein acceptable. That to me sounds like a lot. Here at skein we consider three knots in 100g acceptable but no more than that! Usually our yarns (as well as most indie yarns) are knot free. Sometimes one or two knots are found, but rarely three. Yet if more than three knots are found in your yarn, I think that it's fair to contact whomever you bought the yarn from and tell them about it. This issue can then be further dealt with by the company with both yourself and the supplier. In saying that, every yarn company and dyer has its own way of dealing with knots, so check with them as to what their policy is.
Embrace the knot!
I personally accept knots as a part of the knitting process. I don't believe it's realistic to expect yarn to be knot free. It's string, and string breaks. I like the challenge of being able to deal with knots. I feel rather accomplished when I join the yarn together and it looks seamless. It's a skill knitters need to know, because knots are a reality of knitting. So, my parting advice would be: embrace the knot, see it as a challenge, and use your awesome knitting skills to deal with it successfully.
We would love to hear your thoughts! Let us know what you think about knots in the comments below.

A Guide to Yarn Substitution
Yarn substitution is really easy once you're familiar with the process. Firstly, what is yarn substitution? Basically, it's substituting yarn that has been used in a pattern for another yarn. For example, you might be planning to knit a pattern that calls for a specific yarn, but the yarn listed has been discontinued; or, you might want to use some of your own yarn that you've been eyeing off in your stash. I remember when I first started knitting that I found this to be rather daunting, but over time I learned a few helpful tips that made yarn substitution a breeze. I'm going to share these tips with you, and I'll be using the Portage cardigan pattern (by Melissa Schaschwary) that I recently knit to demonstrate how.
Locate the yarn information in the pattern
Every knitting pattern includes a description of the yarn that was used to knit the original design. Sometimes you might want to check which yarn was used before you commit to buying the pattern. All the information you need can be found for free on the Ravelry pattern page. When looking on Ravelry, you will find this information to the right of the pattern page (see below).

This is pretty much the only information you will need to substitute yarn successfully. The only time you need to know more is if a novelty yarn or a highly textured yarn has been used as they will effect the overall appearance and gauge of your final piece. In these cases, it is best to match yarn texture (e.g. fun fur and boucle) as well as considering the following points.
Yardage
Comparing the metres or yards (i.e. the yardage) of the yarn used in the pattern to the yarn you wish to use, is one of the most important steps in substituting yarn. In our example, the yarn listed on the Ravelry pattern page (see above) has a yardage of 227 metres in 100g. I substituted this yarn for our Voyage DK, the label of which reads:

Our yarn is 210 metres in 100 grams, which is 17 metres less than the yarn that is called for in the pattern. I normally allow around 20 metres difference (plus or minus) between yarns, so this one is a good match. Basically, you need match or get close to the yardage of the yarn used in the pattern, for this will mean that your yarn thickness or weight will be similar and hence so will your gauge. More on that later!
So, what happens if the two types of yarns have different weights per skein or ball? For example, the skein that you have is 115g but the yarn in the pattern weighs 100g? What you need to do here is is to convert your 115g into 100g. It sounds complicated, but it is really easy. Here's how you do it.
Say the yarn we want to use is 280 metres / 306 yards in 115g BUT the yarn used in the pattern is 227 metres / 248 yards in 100g. Use the formula:
metres (or yards) per skein / grams per skein x grams needed
280 metres / 115g x 100g = 243 metres in 100g
We are wanting something close to the yardage of the yarn listed in the pattern: 227 metres in 100g. Using the formula the yarn that we want to substitute works out to be 243 metres in 100g, which is 16 metres more than the yarn listed in the pattern. Given that we can use yarn that is plus or minus 20 metres, our yarn looks to be a good fit!
Please don't rely on matching yarns using the allocated weight classification, and by that I mean matching a 'DK' to a 'DK' weight yarn. A yarn company can add its own classification to a yarn label, which means that a yarn that has been classified as a 'DK' might actually be more similar to a Sport. The only foolproof way to successfully substitute a yarn is by comparing yardages. Also, be careful that you don't mix up metres and yards! Make sure you are comparing metres to metres or yards to yards - don't mix them up! And, of course, play close attention to the weight of each yarn. Like I have said yarn can come in 50g, 100g, 115g, 150g etc. skeins or balls, so make sure you are comparing the same weight of yarn per yardage. If needed, use the formula above to convert the yardage so that each skein is equal in weight.
Fibre Content
In our example, the yarn used for the design is a mix of 70% merino, 20% alpaca, and 10% silk. I used a 100% merino and it worked well. My general rule of thumb is to match the yarn blend as closely as I can. I could have also used a merino and alpaca blend or a merino and silk blend, as long as the merino content was around 70%. When I started knitting this really used to throw me. I thought that I had to precisely match the yarn blends to the exact percent! Please don't let these percentages scare you; close enough is usually good enough.
Matching fibre types as closely as possible is important because different types of fibre do affect drape and structure of the finished piece. Yarns that contain silk do drape differently than, say, cotton. Cotton and linen yarns have quite a bit of structure when knitted up so substituting these yarns with merino or alpaca will dramatically effect the finished shape. Basically, look for yarns that have similar fibre types.
What about superwash and non-superwash yarns, do they differ and should this be a consideration when substituting yarns? You can substitute a non-superwash yarn for a superwash yarn (and vice versa); however, keep in mind that superwash yarns do tend to stretch more after washing than non-superwash yarns. So this is more an issue that relates to gauge (see below). Also, think about who you are knitting for: is this project for you or are you giving this to a non-knitter who may not know how to care for hand-knitted items? Generally substituting a non-superwash yarn for a superwash yarn (and vice versa) is totally fine.
Checking the amount of yarn needed
When substituting yarn, how do you know how many skeins you'll need? OK, I get asked all the time: 'how many skeins of yarn will I need for such and such pattern'? Firstly, you need to check the pattern to see how much the total yardage was for the design in your size.

Using our example, I knit size 35. The total yardage for this size is listed as 1850 yards or 1700 metres. The yardage listed on the Voyage DK yarn label (see above) is 230 yards / 210 metres. Here is the formula you would use:
Total pattern yardage / total yardage per skein = number of skeins needed
So calculating in metres you divide 1700 metres / 210 metres = 8.095 skeins. I would round this up to 9 skeins just to make sure I had enough yarn. You can also calculate this in yards which would be 1850 / 230 = 8.043 skeins. So, again around 9 skeins just to be sure. Just remember that for the formula to work you need to work in either metres or yards. Otherwise you may be playing yarn chicken - yikes!
Gauge Swatch
Gauge swatches are critical for knitting a garment that fits, but that is a whole other blog post! In regard to yarn substitution, your gauge swatch is a great indicator of how your yarn knits up. Does the fabric look good when knitted at the recommended gauge? Does the fabric have the right feel for you? Is the yarn showing off the stitch pattern nicely? These questions are all answered with the gauge swatch, so don't skip this step! You might knit the gauge swatch and find that the yarn isn't working out how you imagined, which means looking around for another one to use. It's much better finding this out on a small gauge swatch than after days of knitting on a larger project.
Still unsure? Then check out these sites
Sometimes we just need a little more reassurance before we dive in to substituting yarn. Here are a list of online resources that can help make your decision easier:
- Yarn Sub - this is an online yarn database that will actually search for yarn substitutions for you. Just type in the yarn that you want to substitute and it will give you a list of similar yarns. The only drawback is not every yarn brand (especially indie dyed companies) are listed, but the major ones are.
- Ravelry pattern pages - these are a wealth of information. You can actually click on the 'Yarn Ideas' tab at the top of the page to see what yarns other knitters have used. Most of the yarns used by Ravelers have been substituted. You can also click on the link under each yarn to see what the project looks like in that yarn. It's such a great resource, so don't forget to use it!.
- If you are unsure if a yarn will work for a specific pattern, just ask. Post a question on Ravelry, email the yarn company or indie dyer, or ask at your LYS.

Reading Variegated Colourways
Reading variegated colourways is a handy skill to have. Firstly, it enables you to plan which project will suit a particular yarn more effectively. Secondly, there will be no nasty surprises like unexpected pooling, because you would have known in advance to alternate skeins. Predicting what a variegated yarn will look like when knit up, however, is easier than it sounds. Basically, it all comes down to dye techniques and knowing - just by looking at a skein of yarn - which method the dyer has used. Once you learn how to identify these dye techniques, reading colourways will become a breeze.
Long-Repeat Colourways

These type of colourways are made up of long repeats of colour that have been placed systematically by the dyer. You can see in the picture above that there are long blocks of colour. When the skein is unwound, the colour blocks become even more obvious:

These type of colourways will stripe, pool and flash (unless you decide to alternate skeins!). Here's an example of what these colourways look like when knitted up:

Randomly dyed Colourways

Speckled and blotchy, these type of colourways have had dyes randomly applied. You won't find long blocks of colour, only short spots and speckles here and there in random places. These colourways are easily identified in a skein, and here is what the above looks like unwound:

Unlike the long-colour repeat yarns, these ones will knit up to produce a fabric that is speckled with colour. The random placement of colours actually prevent striping, flashing and pooling from occurring in knitted fabric; instead, colours will distribute evenly across the knitted piece. Here's an example of a randomly dyed colourway knit up:

Still unsure which colourway you have? Read on!
Sometimes reading variegated colourways can be difficult, particularly if you're looking at a skein of yarn that has been rewound. Some dyers like to rewind their skeins, a process which breaks up colour blocks, making it difficult to determine what type of colourway it is. There is a simple solution, however: wind the skein into a cake using a ball winder, and long-repeat colourways will form a pattern similar to this:
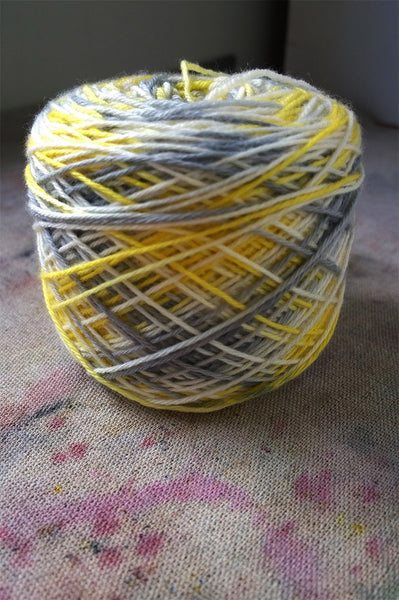
You can see there are areas of yellow and areas of grey, and that the colours have pooled together in the cake. If this happens, you know it's a long-colour repeat yarn.
On the other hand, random-dyed colours look like this when caked:

Lots of random colour, but no colour pooling.
Now some homework!
- Find some variegated yarn in your stash.
- Determine which dye technique was used.
- Make a prediction of how it will knit up.
- Cake up your yarn and cast on - let me know your results :)
Until next week, happy knitting!

Knitting With Variegated Yarn
Many of us are drawn to variegated yarn: it's fun, colourful and looks wonderful in a skein. However, what do you knit with it? Finding patterns that will play nicely with variegated yarn can be daunting, but there are a few stitch patterns and techniques I'm going to share with you today that actually compliment variegated colours. Once you know what these are, you should have no trouble finding patterns for those beautiful skeins of variegated yarn that you have in your stash.
Look For Patterns With Small Lace Repeats.
You might think that combining variegated yarn with a lace pattern is a no no, but this is not true! Small lace and eyelet patterns that are repeated over and over look great with variegated yarns. Here are a few examples:

Brickless by Martina Behm

Monkey by Cookie A

Baby Chalice Blanket by Karen S. Lauger

Wave by Kristen Finlay
Slipped Stitches And Variegated Yarns Are A Match Made In Heaven
It's true! The technique of slipping stitches actually alters the progression of colours, which in turn mixes them around. So next time your looking for a pattern to go with your variegated yarn, look for one that incorporates this technique. Here's some examples:

Bryter by Justyna Lorkowska

Caulfield by Amy Herzog

Scylla by Fiona Bennett

Field of Wildflowers by Joji Locatelli
Add Some Texture
Textured stitch patterns work in a similar way to slipped stitches, in that they alter the colour progression of variegated yarns. Seed stitch, bobbles, textured patterns or cables over reverse stockinette stitch - even garter stitch - really show off variegated colour. Here are some examples:
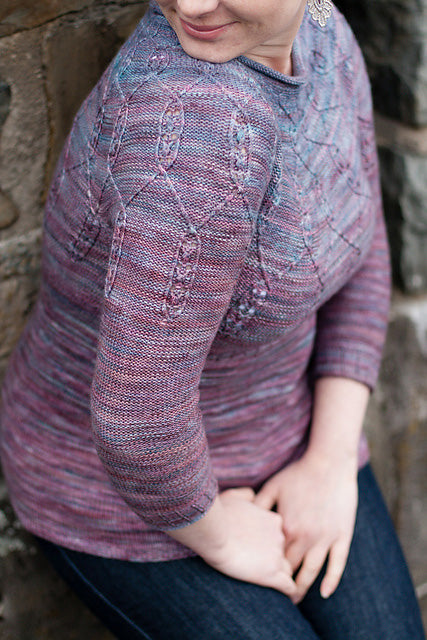
Nelumbo by Asja Janeczek

Broken Seed Stitch Socks by handepande

Glitter by Ela Torrente

Prim Cardigan by Katya Frankel
Combine with a Semi-Solid/Solid Colour
Variegated yarns look fantastic when used together with semi-solid and solid colours in both colourwork or striped patterns. The semi-solid/solid yarn helps to break up the variegated colour into smaller pieces; this approach can be really effective when used with fair-isle patterns. All you need to do is find a semi-solid/solid colour that contrasts well against the variegated yarn. Here are some examples:
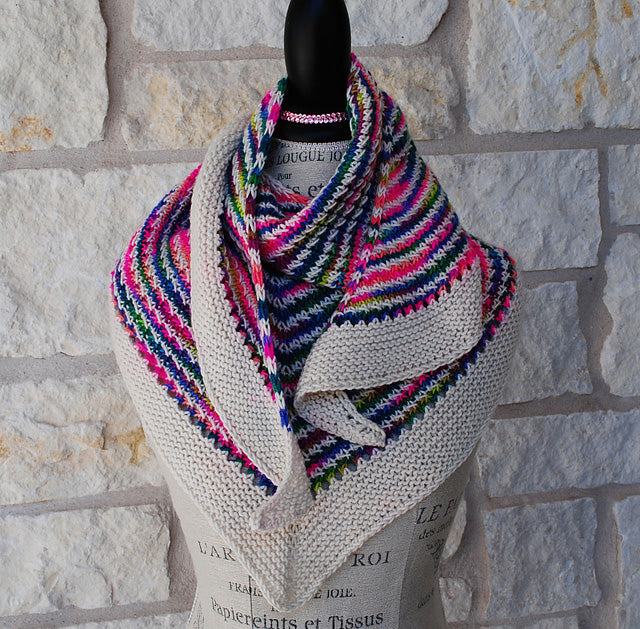
Great Divide Shawl by Michele Brown

Marvelous Mitts by karendipity
Choose a simple design and let the yarn speak
There are so many simple patterns out there that are perfect for letting the yarn take centre stage. Choose a plain stockinette or garter-stitch pattern (if you don't like pooling make sure you alternate skeins) and wear your variegated yarn with pride!
Need some inspiration? Check out what others have knit using variegated yarn over on Ravelry.
If you enjoyed this post please let me know in the comments below or, if you have some pattern suggestions for variegated yarn, I would love to hear them.
Until next week, happy knitting!

